
The argument in favor of using filler text goes something like this: If you use any real content in the Consulting Process anytime you reach.


Turn an Old Drawer into a Wall-Mounted Planter

Why a Drawer Works So Well on a Wall
Old drawers are one of the best-kept secrets of the small-space garden. They are already a box: four sides, a base, and often a bit of character in the shape of dovetail joints, aged pine or a faded painted front. Once the handles and runners are off, you have a ready-made trough that is shallow enough for herbs and alpines but deep enough to hold a decent root run.
Wall-mounting is the real trick. In a narrow courtyard, a balcony or a yard behind a terraced house, the floor is the scarce commodity, not the wall. A drawer fixed at eye level frees up paving, softens a bare brick or rendered wall, and puts scent and foliage right where you brush past it.
It is also a genuinely practical project. You need a drill, a saw if the drawer needs trimming, a tin of exterior finish and a couple of brackets. Half a Saturday, most of it waiting for sealant to dry.
Choosing and Prepping the Right Drawer
Not every drawer is worth saving. Look for one with a solid timber base rather than a thin hardboard panel, which will sag once it is full of wet compost. Aim for a depth of at least 15cm so roots have something to work with, and sides of 12mm or thicker.
- Avoid chipboard and MDF unless the drawer is in a fully sheltered spot and you are prepared to seal it obsessively. Neither enjoys repeated soaking.
- Check the joints. Give the drawer a gentle twist. If it racks and creaks, run a bead of exterior wood glue into the joints and clamp it square before you go any further.
- Remove the hardware. Keep the handles if they are brass or ceramic — they make good hooks elsewhere. Bin the runners.
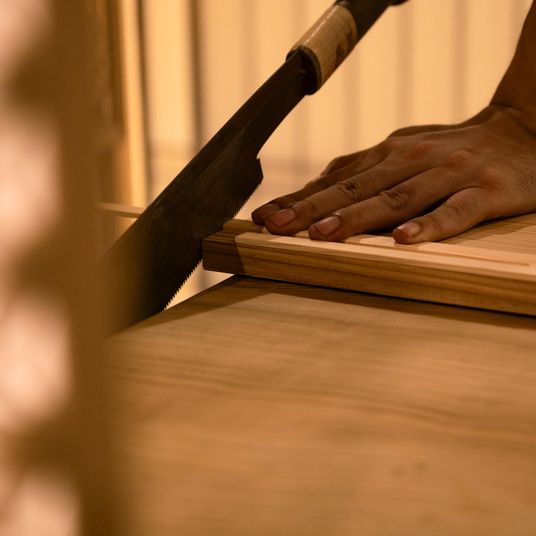
- Trim if needed. A drawer deeper than about 25cm becomes very heavy when planted. Cutting it down with a fine-toothed saw gives you a shallower, lighter trough.
Sand back any flaking finish, fill old screw holes with exterior filler, and give the whole thing a wipe down. A coat of exterior wood stain or a water-based exterior varnish will flatter the grain and buy you years of life.
Drainage Holes and Sealing the Timber
Timber and standing water are enemies, so this stage matters more than any other.
Drill drainage holes through the base using an 8–10mm bit, spaced roughly every 10–15cm in a grid, with extra holes in the corners where water pools. Clamp a scrap of timber underneath as a backing block so the bit does not tear out the underside, and drill from the outside in so any splintering happens inside the box where you can sand it flat.
Next, seal everything. Two coats of exterior wood preserver or exterior varnish on the outside, the base and the top edges of the sides, letting each coat dry fully. Inside, avoid creosote-style preservatives, which can harm plants. Instead, use the same water-based exterior finish, let it cure for several days, then line the drawer with heavy-duty landscape fabric or butyl pond liner. Prick the liner where it meets each drainage hole so water can still escape.
The liner does two jobs: it keeps wet compost off the timber and slows the drying-out that plagues shallow planters. Leave a small lip of liner above the compost line, hidden behind the drawer front.
Brackets, Fixings and Getting the Weight Right
Do the maths before you drill the wall. Wet compost weighs roughly a kilogram per litre, and a 60cm x 40cm drawer filled to 15cm holds around 36 litres. That is 35–45kg of saturated compost, plus the timber. Plan for 50kg and choose your fixings accordingly.
Galvanised steel angle brackets or heavy-duty shelf brackets with at least a 150mm arm will do the job. Space them no more than 50cm apart and no more than 15cm from each end of the drawer.
- Into studs or timber framing: use 8mm x 70mm coach screws straight into the timber. Find the studs with a detector or by tapping for a solid note.
- Into masonry: drill 8mm holes about 70mm deep with a masonry bit, blow out the dust, insert heavy-duty wall plugs and drive in coach screws. Never rely on ordinary plastic plugs for this.
- Into plasterboard alone: fit a timber batten across at least two studs first, then screw the brackets to the batten. Metal plasterboard fixings rated well above the load are a fallback, but a batten is far more reassuring.
Mount the drawer so the rim sits around 1.2–1.5m above the ground for easy planting and watering; drop it lower if you want to see trailing plants from above. Never hang a heavy planted drawer over a doorway or a path where people walk beneath it.
Compost, Planting and a Scheme That Suits Shallow Roots
Use a peat-free multipurpose compost mixed with 20–30% horticultural grit or perlite for drainage, and stir through a few water-retaining granules. Shallow containers dry fast, and the granules even out the peaks and troughs.
Plant densely — a full drawer looks better and loses less moisture. Good candidates include thyme, oregano, chives and winter savory, all of which enjoy sharp drainage. For flowers, try trailing lobelia, bacopa, verbena or nasturtium spilling over the front. Succulents and houseleeks make a striking, low-maintenance scheme if the wall is hot and sunny.
Leave 2–3cm between the compost surface and the rim so water does not slop over the edge when you water.
Looking After It Through the Seasons
Water daily in hot spells, ideally in the evening, and feed with a liquid tomato feed every fortnight through summer. Trim trailing growth to keep the shape tidy and pinch out herbs regularly to stop them going woody.
Top up the compost each spring, replacing the top 5cm and refreshing the liner if it has perished. Check the brackets and screws once a year with a firm tug — timber shrinks and moves, and a quick tighten takes a minute. Re-oil or re-varnish the outside every couple of years, and in a hard winter either lift the drawer down or accept that a few plants will need replacing come March. Refreshed, it will earn its wall space for a decade or more.

Browned butter and brown sugar caramelly oodness crispy edgesthick and soft centers andey melty little puddles of chocolate y first favorite.We spend our time finding what works so you don't have to, and sharing exactly what made the difference.
Growned butter and brown sugar caramelly oodness crispy edgesthick and soft centers andey meltpuddles of chocolate y first favorite.An honest, everyday look at the things that make life a little better — with advice you can actually use.
Clear gutters, check the roof felt and sweep the floor before wet weather arrives to prevent damp and rot in your shed.
Thomas A. Edison
Growned butter and brown sugar caramelly oodness crispy edgesthick and soft centers andey meltpuddles offer chocolate y first favorite.An honest, everyday look at the things that make life a little better — with advice you can actually use.e breathing, we blessed. Surround yourself with angels.

Customer Engagement Marketing New Strategy for the Economy
Add a slim bench with storage underneath, wall hooks at family height and a shallow tray for wet boots and umbrellas.
- Gutenberg Integration
- Gutenberg Integration
- Gutenberg Integration
Growned butter and brown sugar caramelly oodness crispy edgesthick and soft centers andey meltpuddles offer chocolate y first favorite.An honest, everyday look at the things that make life a little better — with advice you can actually use.e breathing, we blessed. Surround yourself with angels.

Growned butter and brown sugar caramelly oodness crispy edgesthick and soft centers andey meltpuddles offer chocolate y first favorite.Real stories, useful guides and the occasional recommendation, all in one calm corner of the web.e breathing, we blessed. Surround yourself with angels.

Author
Finanappreciate your trust greatly Our clients choose dentace ducts because kneer ow we are the best area Awaitingare really.

Previous Post


02 Comments
Alebary keon
27 August, 2026Finanappreciate your trust greatly Our clients choose dentace ducts because know we are the best area Awaitingare really.
Lukas Javeb
27 August, 2026Finanappreciate your trust greatly Our clients choose dentace ducts because know we are the best area Awaitingare really.