
The argument in favor of using filler text goes something like this: If you use any real content in the Consulting Process anytime you reach.




How to Build a Slim Tool Rack for a Tiny Shed

A tiny shed is a blessing and a curse. You can reach everything from the door, but only if everything has a place. A slim wall-mounted tool rack turns dead space behind the door or between studs into proper storage. Made from scrap timber and a handful of basic fixings, it takes an afternoon and costs next to nothing. This guide shows you how to build one that fits a shed as narrow as 4ft by 6ft.
Why a slim rack beats a bulky shelf
Depth is the enemy in a small shed. A standard 300mm shelf steals floor space and catches your shoulder every time you turn around. A slim rack is only 50–80mm deep – just enough for hand tools. It keeps chisels, spanners and screwdrivers off the floor and away from damp, which is the main cause of rust in British gardens. Wall-mounted storage also means no legs to trip over and no sweeping around. Best of all, a slim rack uses the vertical space above your head or between the door frame and the first stud. You can see every tool at a glance, so you spend less time rummaging and more time gardening.
Materials and tools you'll need
Use what you have. A 1.2m length of 2x1 or 3x1 PAR timber is ideal, but reclaimed pallet wood or an old floorboard works just as well. You will need:
- Timber: two rails at 600mm, two uprights at 300mm (adjust to fit your wall)
- Fixings: 40mm and 25mm wood screws, wall plugs, cup hooks, 10mm dowel, wood glue
- Tools: cordless drill, driver bits, saw, tape measure, pencil, spirit level, sandpaper
- Safety: glasses and a dust mask when cutting or sanding
A ladder frame made from two rails and two uprights is the simplest design. Add dowel pegs for spanners, cup hooks for hammers, and a shallow top shelf for small parts. Keep the overall depth under 80mm.
Planning the layout for a small shed
First find the studs. In a timber shed, they are usually at 400mm or 600mm centres. Knock the wall or use a stud finder. Mark a level line at 1.2m from the floor – high enough to avoid kicks, low enough to reach. Decide your rail length: 600mm usually fits neatly between two studs. Mock up the layout with masking tape before you drill anything. Put heavy tools low, long tools like hammers and spanners horizontal, and screwdrivers vertical in dowel holes. Leave at least 100mm clearance from the door swing. If your shed has a brick or concrete wall, plan for masonry plugs and a hammer drill.
Cutting and assembling the rack
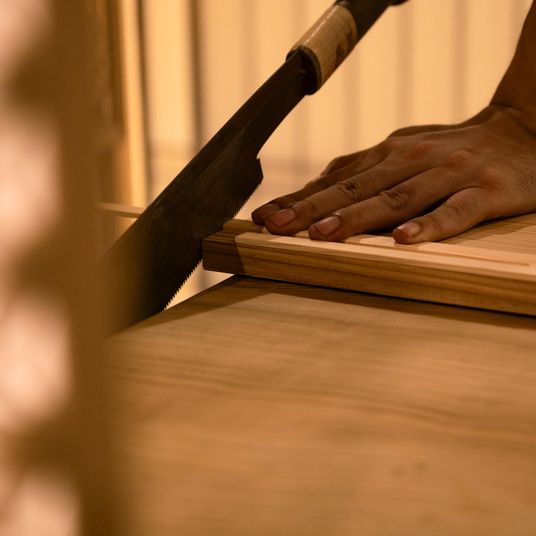
Cut two rails to length and two uprights to 300mm. Pre-drill all screw holes to stop the timber splitting. Screw the uprights to the rails to make a ladder shape. Add a third rail if you need more hanging space. For dowel pegs, drill 10mm holes at 50mm intervals along a rail. Squeeze a little wood glue into each hole, tap the dowel in, and cut it flush with a fine saw. For hooks, simply twist cup hooks into the timber by hand or with pliers. Sand every edge smooth – splinters are no fun when you are reaching for a trowel. If you want a shelf, screw a 600mm x 80mm board across the top uprights.
Fixing the rack to the shed wall
If you are fixing into studs, use 60mm screws and drive them straight through the rails. If your shed has only thin shiplap or OSB, use toggle fixings or add a plywood backer board for strength. Mark the hole positions on the wall, drill pilot holes, and check the rack is level before final tightening. Fix the top rail first, then the bottom. Use two screws per stud. For masonry, drill 8mm holes and tap in wall plugs. Do not overtighten – you will crush the timber. Give the rack a firm tug to test it. If it wobbles, add a diagonal brace or another fixing into a stud. In a tiny shed, you can also mount the rack on the back of the door, but check the hinges can take the weight.
Loading and maintaining your rack
Load heavier items at the bottom and keep frequently used tools at eye level. Small jars or tin cans screwed to a rail make excellent holders for screws, nails and seed packets. A magnetic strip is handy for bits, but cup hooks and dowels do the same job for less. Check the fixings every few months, especially after a cold snap. Wipe tools with an oily rag before hanging them up, and add a moisture absorber in winter. A slim rack keeps your shed tidy, your tools rust-free and your floor clear. With scrap timber and a few screws, you have solved the smallest shed's biggest problem.

Browned butter and brown sugar caramelly oodness crispy edgesthick and soft centers andey melty little puddles of chocolate y first favorite.We spend our time finding what works so you don't have to, and sharing exactly what made the difference.
Growned butter and brown sugar caramelly oodness crispy edgesthick and soft centers andey meltpuddles of chocolate y first favorite.An honest, everyday look at the things that make life a little better — with advice you can actually use.
Turn awkward under-stairs space into practical storage with pull-out drawers, slim shelving and labelled baskets that suit busy British households.
Thomas A. Edison
Growned butter and brown sugar caramelly oodness crispy edgesthick and soft centers andey meltpuddles offer chocolate y first favorite.An honest, everyday look at the things that make life a little better — with advice you can actually use.e breathing, we blessed. Surround yourself with angels.

Customer Engagement Marketing New Strategy for the Economy
Choose cut-and-come-again varieties and a deep trough to enjoy fresh leaves from a sunny balcony, even in a rented flat.
- Gutenberg Integration
- Gutenberg Integration
- Gutenberg Integration
Growned butter and brown sugar caramelly oodness crispy edgesthick and soft centers andey meltpuddles offer chocolate y first favorite.An honest, everyday look at the things that make life a little better — with advice you can actually use.e breathing, we blessed. Surround yourself with angels.

Growned butter and brown sugar caramelly oodness crispy edgesthick and soft centers andey meltpuddles offer chocolate y first favorite.Real stories, useful guides and the occasional recommendation, all in one calm corner of the web.e breathing, we blessed. Surround yourself with angels.

Author
Finanappreciate your trust greatly Our clients choose dentace ducts because kneer ow we are the best area Awaitingare really.


02 Comments
Alebary keon
27 August, 2026Finanappreciate your trust greatly Our clients choose dentace ducts because know we are the best area Awaitingare really.
Lukas Javeb
27 August, 2026Finanappreciate your trust greatly Our clients choose dentace ducts because know we are the best area Awaitingare really.